Installing Cloudbase-Init on Windows for vRA Customisation
A brief guide to installing Cloudbase-Init in a VMware vSphere VM template to use with vRealize Automation 8

I try to steer clear of posting content like this, as I don't think that it normally adds too much value. However, I wanted to write this to provide a reference for a future post.
Cloud-Init is either pre-installed by default or easily installed in several Linux variants. For Windows, however, the steps are a little different. What I'm going to cover are the steps / methods that can be used to install Cloudbase-Init in to a Windows server template to allow #cloud-config commands to be issued by vRealize Automation.
Pre-Requisites
The software that we're going to be installing is called Cloudbase-Init, by Cloudbase Solutions. You're going to want to download it and have it available to transfer to your template VM, or you can download directly in to the VM if it has internet connectivity.
You'll also need a Windows Server template VM to work with. For this guide, I've created a vanilla Windows Server 2019 Standard VM that includes the desktop experience. The only things that I've done to this VM are:
- Install the OS from the latest ISO image available from Microsoft at the time of writing.
- Install VMware Tools.
- Connect the VM to a DHCP network with internet access.
As I said, you can either download the Cloudbase-Init install file and copy it across your network to the VM or download it directly. To do the latter, this PowerShell one-liner might help:
Invoke-WebRequest -Uri https://cloudbase.it/downloads/CloudbaseInitSetup_Stable_x64.msi -OutFile C:\CloudbaseInitSetup_Stable_x64.msiInstalling Cloudbase-Init
- Find that install file and double-click on it.
- Click Next on the Welcome screen and accept the license agreement. Click Next again.
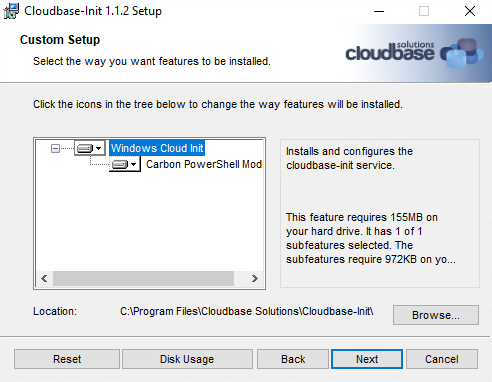
- You can change the install location if required, but I tend to leave it at the default. Click Next to proceed.
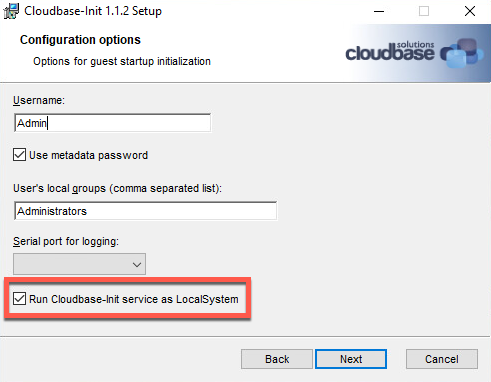
4. For Configuration Options, the default username is set to "Admin". This would create a new user in the guest OS when Cloudbase-Init runs. The password would be expected to be set in the cloud-config metadata by default. (My personal preference is not to do that and the behaviour can be changed later.)
The important thing to do is tick the option to run the Cloudbase-Init service as LocalSystem. Click Next.
5. Finally, click the Install button.
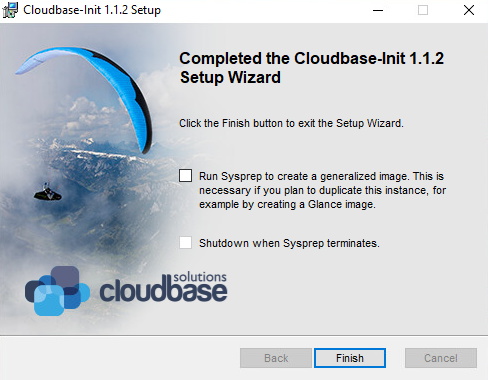
6. When the install is complete, there are two options selectable before closing the installer. I don't select either of these options but instead do a little post-install configuration. Leave the options unchecked and click Finish.
Post-Install Configuration
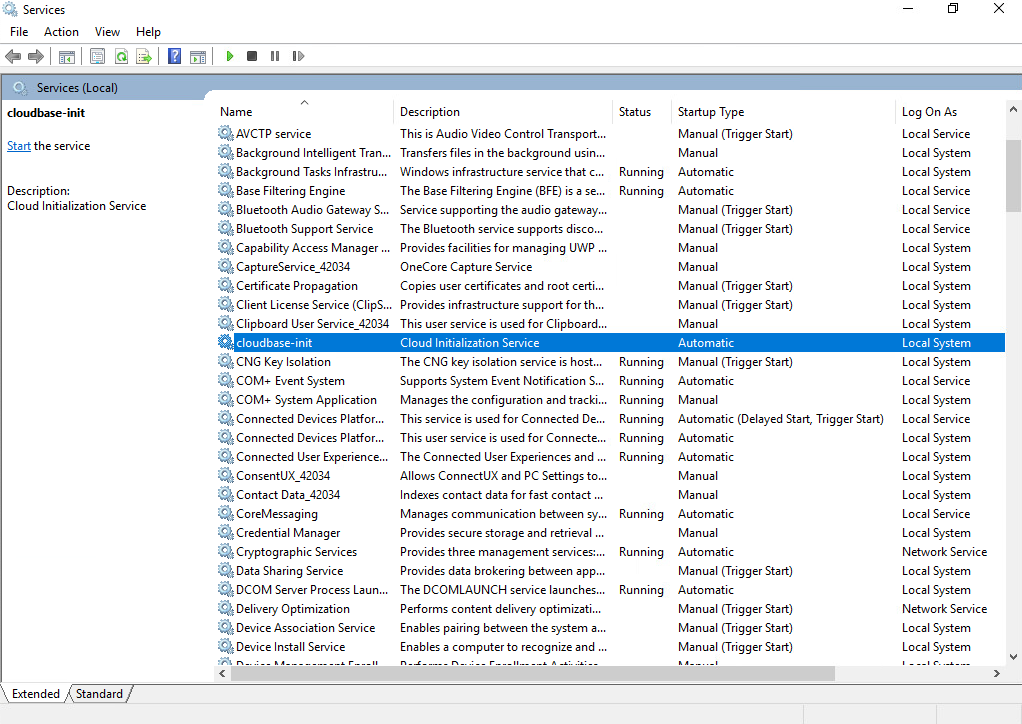
Windows Service
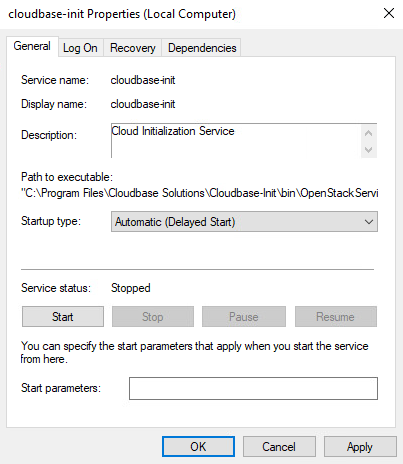
Cloudbase-Init is now installed and configured to run as a system service. However, the default is to run the service automatically at startup. This can cause problems with VMware Tools customisation if both are triggered.
The easiest way that I've found to get around that is to change the Startup Type to Automatic (Delayed Start). This starts the service much later in the OS boot process, usually after VMware Tools customisation has either completed or triggered a reboot.
Configuration Files
By default, the configuration files that Cloudbase-Init uses will be stored in the location C:\Program Files\Cloudbase Solutions\Cloudbase-Init\conf. These files determine where Cloudbase-Init will look to retrieve configuration from and what services are enabled to customise the guest operating system. The default settings will work in a lot of cases, but it's worth reading the documentation to understand what is possible.
For vSphere and vRealize Automation, we don't need two of the configuration files so I typically remove them. They are:
- cloudbase-init-unattend.conf
- Unattend.xml
Update (23/09/2021): I forgot a bit in my hurry to publish this (kudos to @virtualhobbit for spotting my omission). For vSphere and vRA, you need to make a configuration file change. The default contents of cloudbase-init.conf are shown below, but a couple of changes are required.
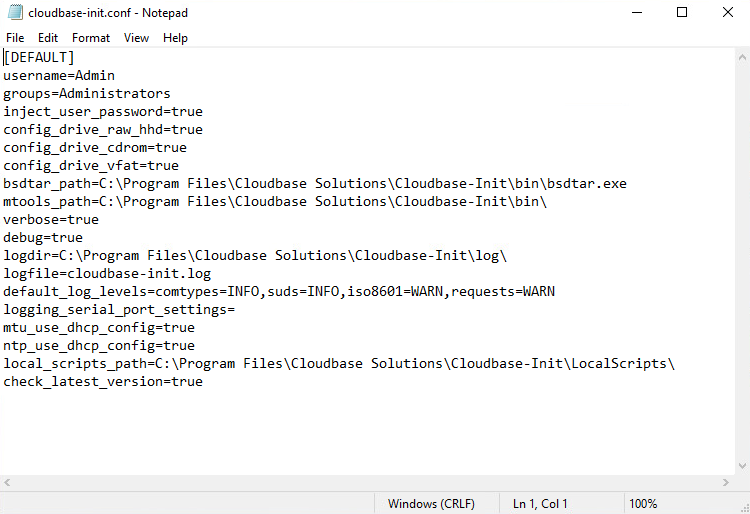
As mentioned earlier I prefer not to create a default user this way, and we need to tell Cloudbase-Init to use the OVF datasource to read its metadata and userdata from. For these reasons, I alter the cloudbase-init.conf file to have these contents:
[DEFAULT]
bsdtar_path=C:\Program Files\Cloudbase Solutions\Cloudbase-Init\bin\bsdtar.exe
mtools_path=C:\Program Files\Cloudbase Solutions\Cloudbase-Init\bin\
verbose=true
debug=true
logdir=C:\Program Files\Cloudbase Solutions\Cloudbase-Init\log\
logfile=cloudbase-init.log
default_log_levels=comtypes=INFO,suds=INFO,iso8601=WARN,requests=WARN
local_scripts_path=C:\Program Files\Cloudbase Solutions\Cloudbase-Init\LocalScripts\
metadata_services=cloudbaseinit.metadata.services.ovfservice.OvfService
plugins=cloudbaseinit.plugins.common.userdata.UserDataPlugin
Shutdown / Convert to Template
Generally, this is sufficient to use with vRealize Automation 8.x and vRealize Automation Cloud. The only remaining steps are to:
- Shutdown the VM
- Convert it to a template in vSphere and add it to vRealize Automation
Advanced Installation
Once you've played about with #cloud-config in vRA for deploying Windows VMs, you can experiment with some of the other configuration settings and even automate the installation of Cloudbase-Init as part of Packer build. For an example of this, please feel free to look at my GitHub repository and my other posts on Packer.