Creating a Packer Container for an Image Factory
How to create a simple Docker container for executing HashiCorp Packer builds

I recently detailed the steps that I went through to create a standalone Docker host on Photon OS to be used as part of a larger solution by VMware Aria Automation. In this post I'm going to focus on the container image that's going to run on that host.
What I'm aiming to achieve is to have a pipeline that takes my Packer builds from my source control repository and builds them for me without me having to initiate the process. Part of that involves having somewhere for Packer to run. I could, and have done in the past, have a Linux host with Packer on it that can be accessed via SSH. It works, but it's a host that I don't want to have to maintain and it's not easy to move between versions of Packer. Instead, if I have Packer in a container then the container's configuration is well locked down. The containers are ephemeral - after use they are destroyed - so tidying up isn't a problem. I'm also doing it because I can!
Not familiar with Docker? Creating images isn't too hard. Let me walk you through this one.
Dockerfile
Docker images are created using a Dockerfile. This is just a text file that defines what an image is comprised of. Each line or element in the file is a layer in your resultant image. Ideally we don't want the image to be too big or complicated. We want it to contain nothing more or less than is need to complete its job.
Let's go line-by-line.
FROM photon:latestThis first line tells Docker where to start. It's like a foundation. Here we are instructing it to start with the latest Photon OS image. Why Photon? There are smaller, leaner images to use but I want to make sure that my resulting image can be used in VMware Aria Automation Pipelines. Some of the smaller images can have issues interacting with Aria Automation Pipelines.
ARG VERSIONThis line creates an argument called VERSION that we need to populate when we build the image. It's not required for Docker, but in this image it is used further on.
LABEL maintainer="blog.v12n.io"
LABEL version="$VERSION"
The labels are a good practice so that people who know created the image or perhaps, in this case, what version the image is. As you'll see shortly, the version of the image correlates directly to the version of Packer being used.
# Update packages and install new ones
RUN tdnf install -y curl unzip git wget tar bindutils coreutils xorriso jq mkpasswd && \
    tdnf autoremove -y && \
    tdnf clean all
The base Photon image is very minimal. There are some extra packages that I need later on so they get added to the image.
- xorriso - used to create ISO images by Packer
- jq - used to transform Packer manifest files
- mkpasswd - used to encrypt passwords
# Install Packer
ADD https://releases.hashicorp.com/packer/${VERSION}/packer_${VERSION}_linux_amd64.zip ./
RUN unzip packer_${VERSION}_linux_amd64.zip -d /bin && \
    rm -f packer_${VERSION}_linux_amd64.zip
Using that VERSION argument again, these lines download Packer directly from HashiCorp and unzip it.
ADD VERSION .Finally, and again just a nice-to-have, I add the local file VERSION in to the image.
The full Dockerfile looks like this:
FROM photon:latest
ARG VERSION
LABEL maintainer="blog.v12n.io"
LABEL version="$VERSION"

# Update packages and install new ones
RUN tdnf install -y curl unzip git wget tar bindutils coreutils xorriso jq mkpasswd && \
    tdnf autoremove -y && \
    tdnf clean all

# Install Packer
ADD https://releases.hashicorp.com/packer/${VERSION}/packer_${VERSION}_linux_amd64.zip ./
RUN unzip packer_${VERSION}_linux_amd64.zip -d /bin && \
    rm -f packer_${VERSION}_linux_amd64.zip

# Complete
ADD VERSION .
Version
At the time of writing, the latest version of Packer in 1.8.6. Alongside the Dockerfile I have a small file called VERSION that contains just this version number. Here's the whole lot together in its GitHub repository.
Building
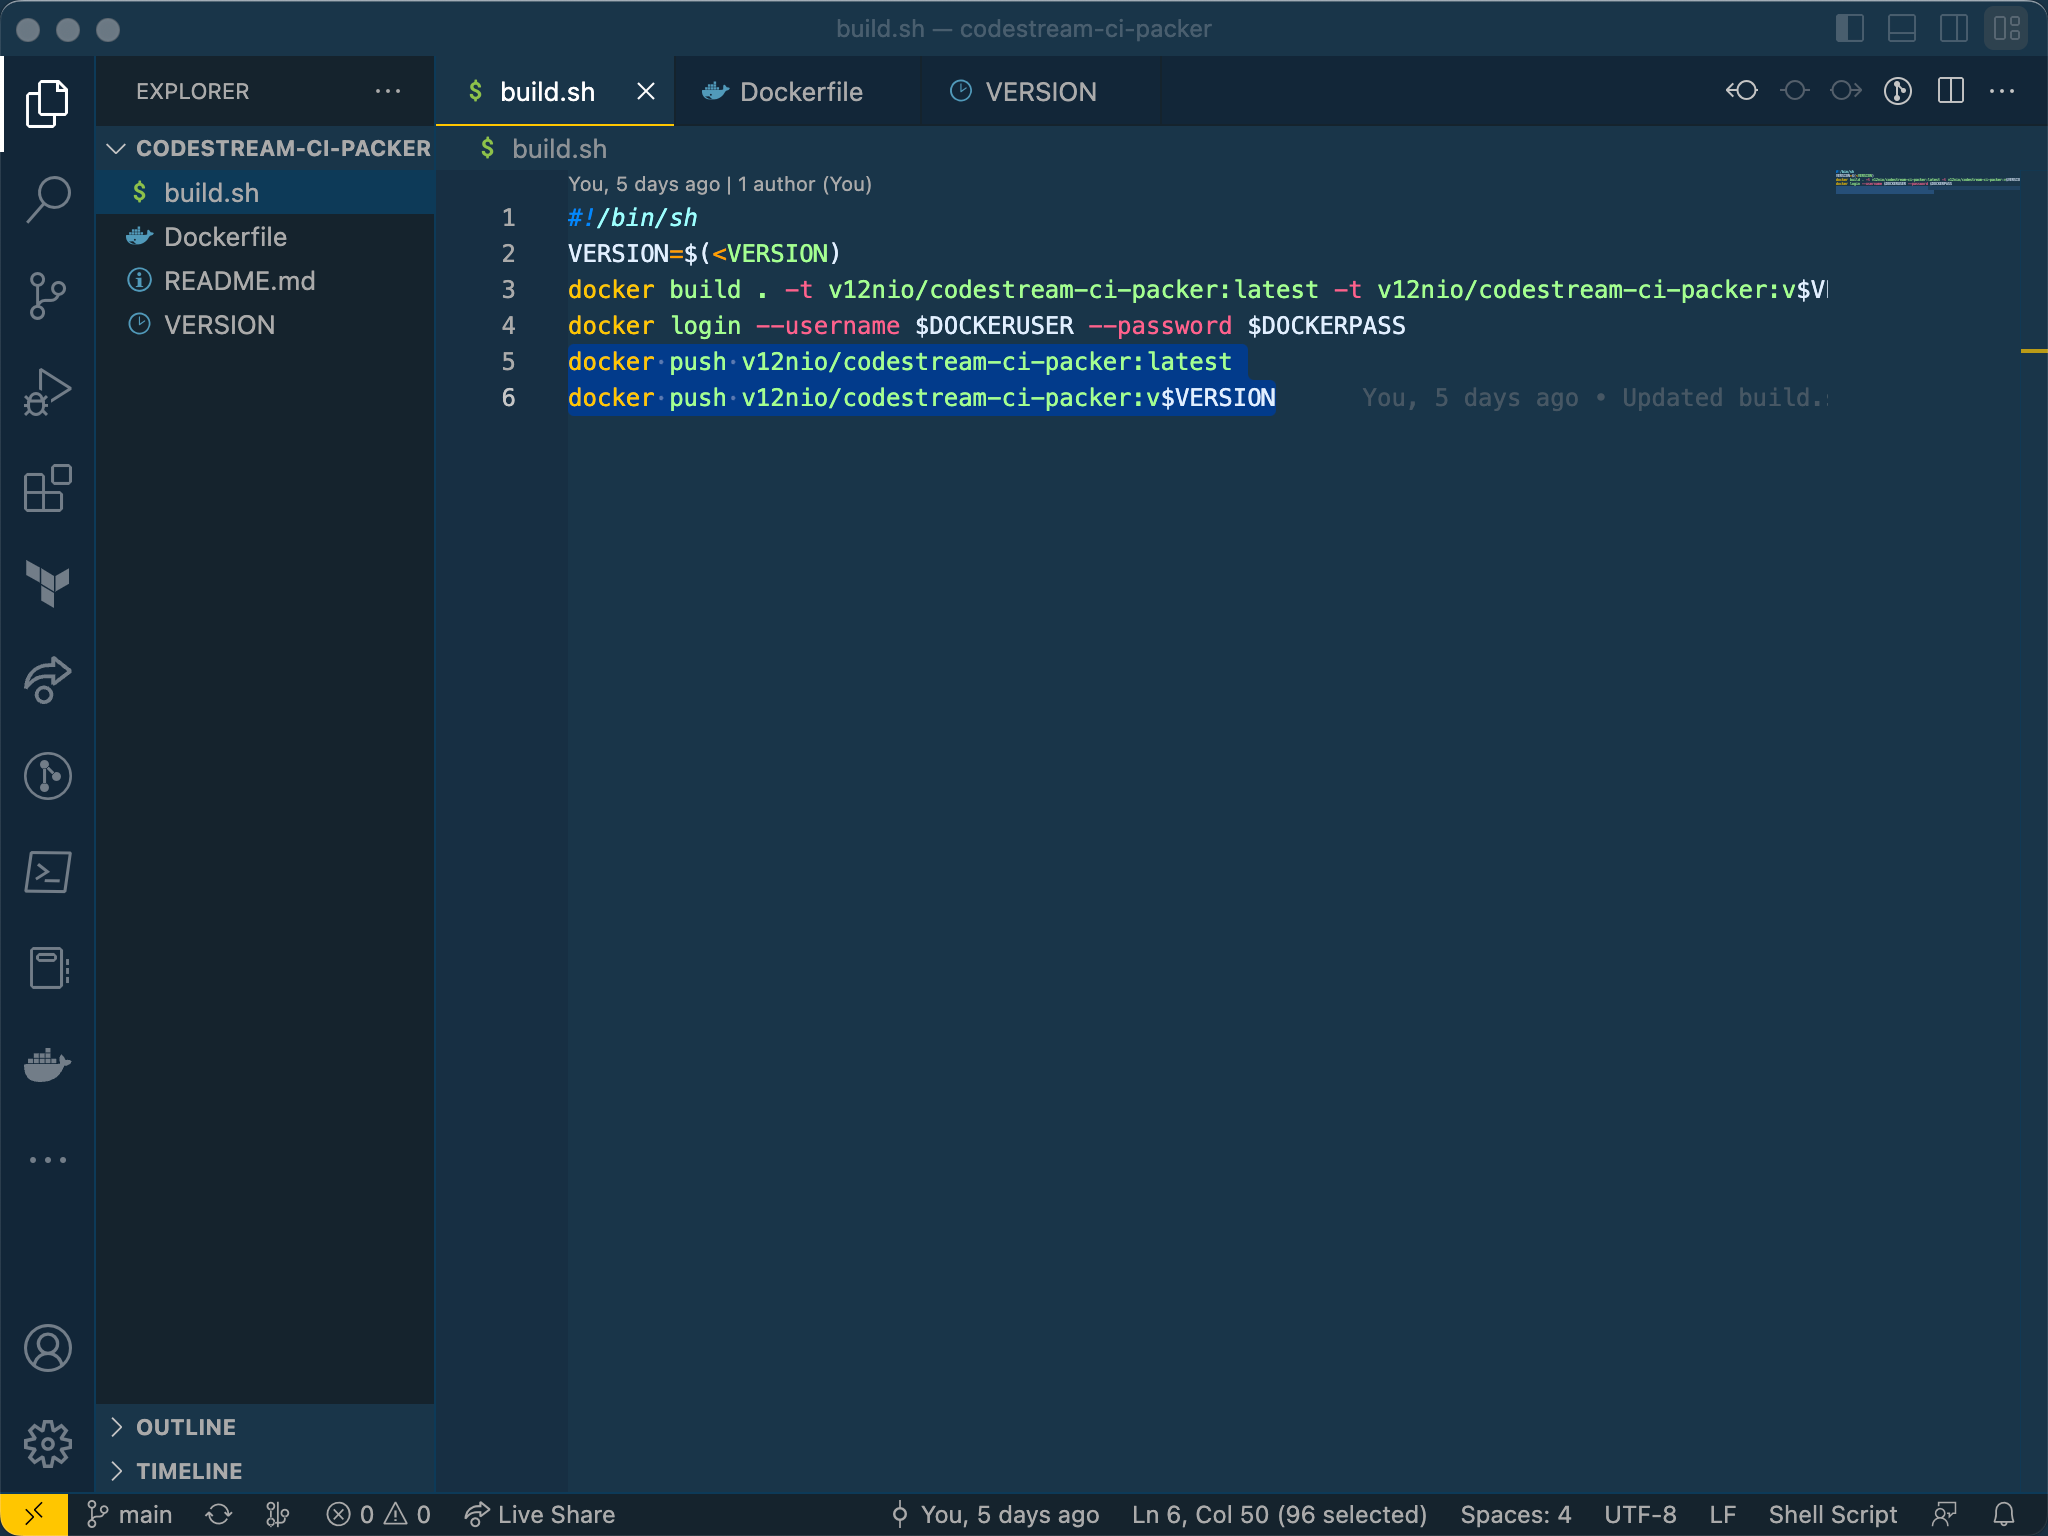
Now that we have a Dockerfile and the VERSION file let's build an image! Assuming that you have access to Docker, building an image is pretty straightforward. In this case there is a minor step to be completed first. Assuming that you're at a command line in the directory where the two files above are located, first read in the VERSION file:
VERSION=$(<VERSION)This populates the variable "VERSION" with a value of 1.8.6 (or whatever the contents of the file are).
Next, we simply build the image with Docker:
docker build . -t v12nio/codestream-ci-packer:latest -t v12nio/codestream-ci-packer:v$VERSION --build-arg VERSION=$VERSIONThis builds the image and tags it with the tags "latest" and the tag "v1.8.6" with the value of VERSION being passed in by the --build-arg option.
Publishing
As a final step, I push the image to my free account at hub.docker.com. That way Aria Automation can just pull it down to use in my pipeline.
docker push v12nio/codestream-ci-packer:latest
docker push v12nio/codestream-ci-packer:v$VERSION
The image itself is only transferred once, but gets tagged twice so that it can be referenced either by "latest" or directly by the version.
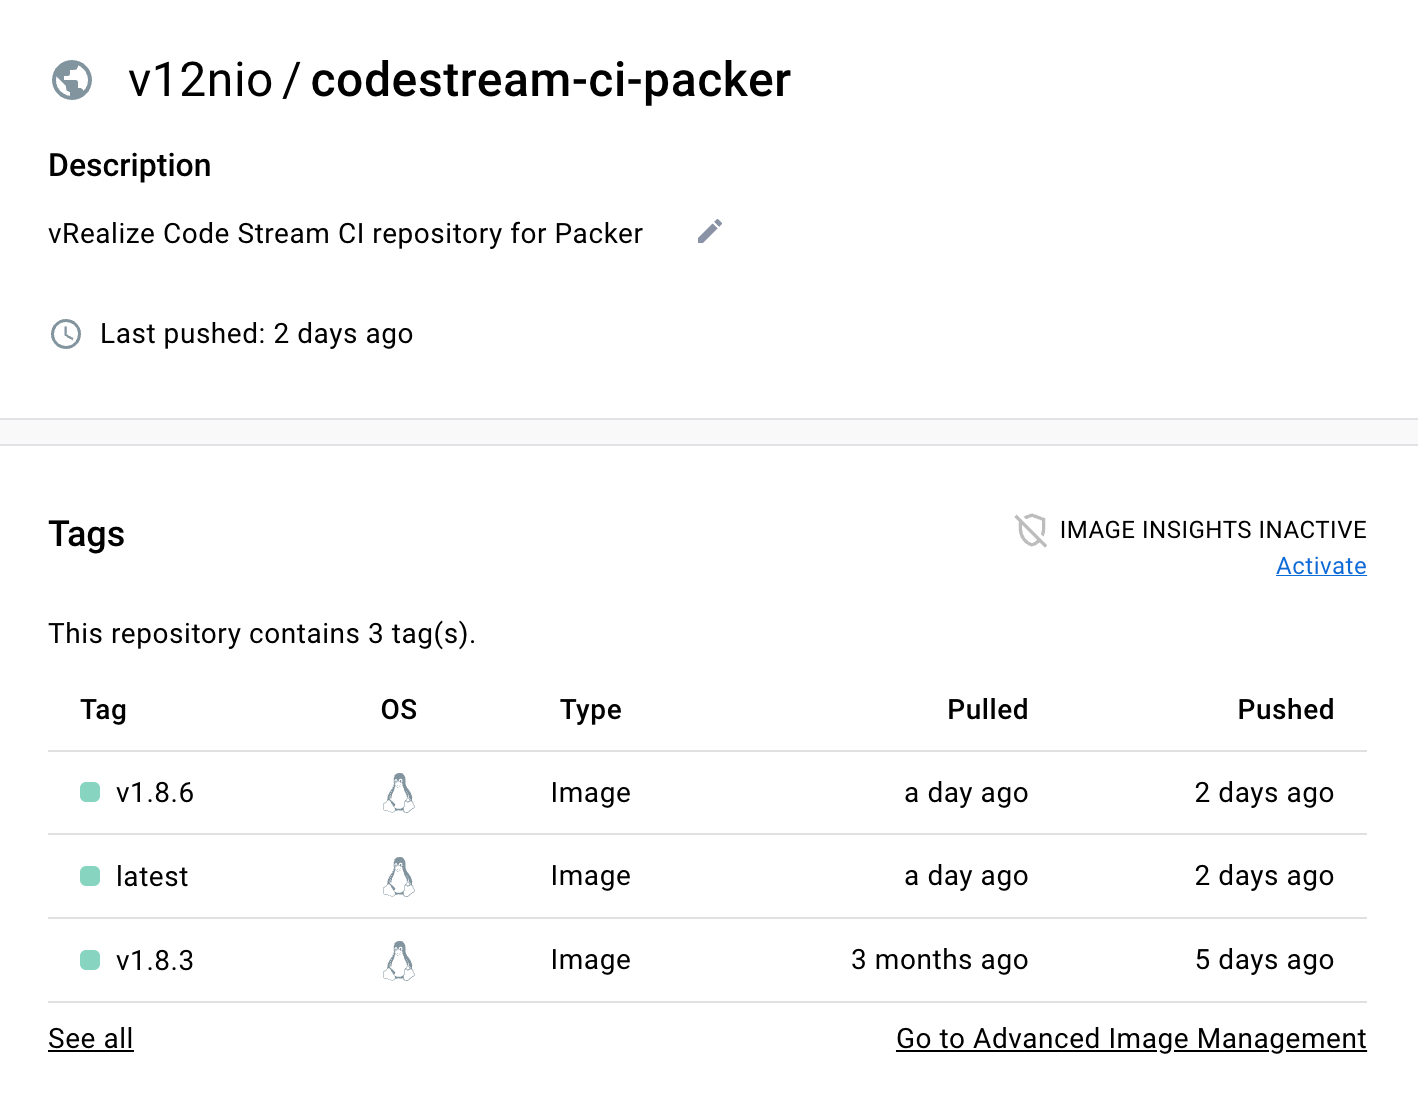
Using the Image
The image can now be pulled by anyone from dockerhub directly and used. It's that simple.
You're very welcome to use the published images, or fork the repository. I'm always happy to take feedback and suggestions too.