How to get BGP working on a UniFi Dream Machine Pro
BGP isn't available natively on the UniFi Dream Machine Pro, but there is a way. This post explains how.


I stayed up quite late the other night to get BGP working on my UniFi Dream Machine Pro (UDMP) and I thought I'd share how I did it as I know that at least two followers on Twitter are very interested.
But first, a little background...
The UDM Pro was launched in early 2020, just before this darned pandemic started. It was positioned as a successor to the USG Pro 4 and a significant upgrade from the standard USG that I had as my internet gateway. It offered a handy 10GB SFP LAN port, which is what attracted my attention to it. As an existing UniFi user, switching my older USG to the UDM Pro enabled me to introduce 10GB networking to my homelab and keep the existing WiFi setup that I had at home too.
At the time that I bought it I knew that it didn't have BGP (Border Gateway Protocol) available but I assumed that it would be added as a feature eventually as the USG Pro 4 had it. With the release of the 1.11.0 firmware recently I decided that the time had finally come to do something about it.
I had previously read that FRRouting could be configured to run on the UDMP and allow it to peer with other BGP enabled devices (such as an NSX-T Tier 0 edge) but there weren't any clear instructions in a single place that I could follow so I had to piece it together myself.
About the UDM Pro
The UDMP is a 1U network device that includes both 1GB and 10GB WAN interfaces as well as 8x 1GB LAN ports and a 10GB LAN port. In addition to routing and switching, it includes some firewalling capabilities too. The UniFi OS that it runs enables a number of management "applications" to run that are used for network configuration and optionally network video recording, access control and IP telephony. I just use it for networking though.
Inside the UDMP there seems to be some Debian variant of Linux running and the applications that I mentioned above are actually executed in a container.
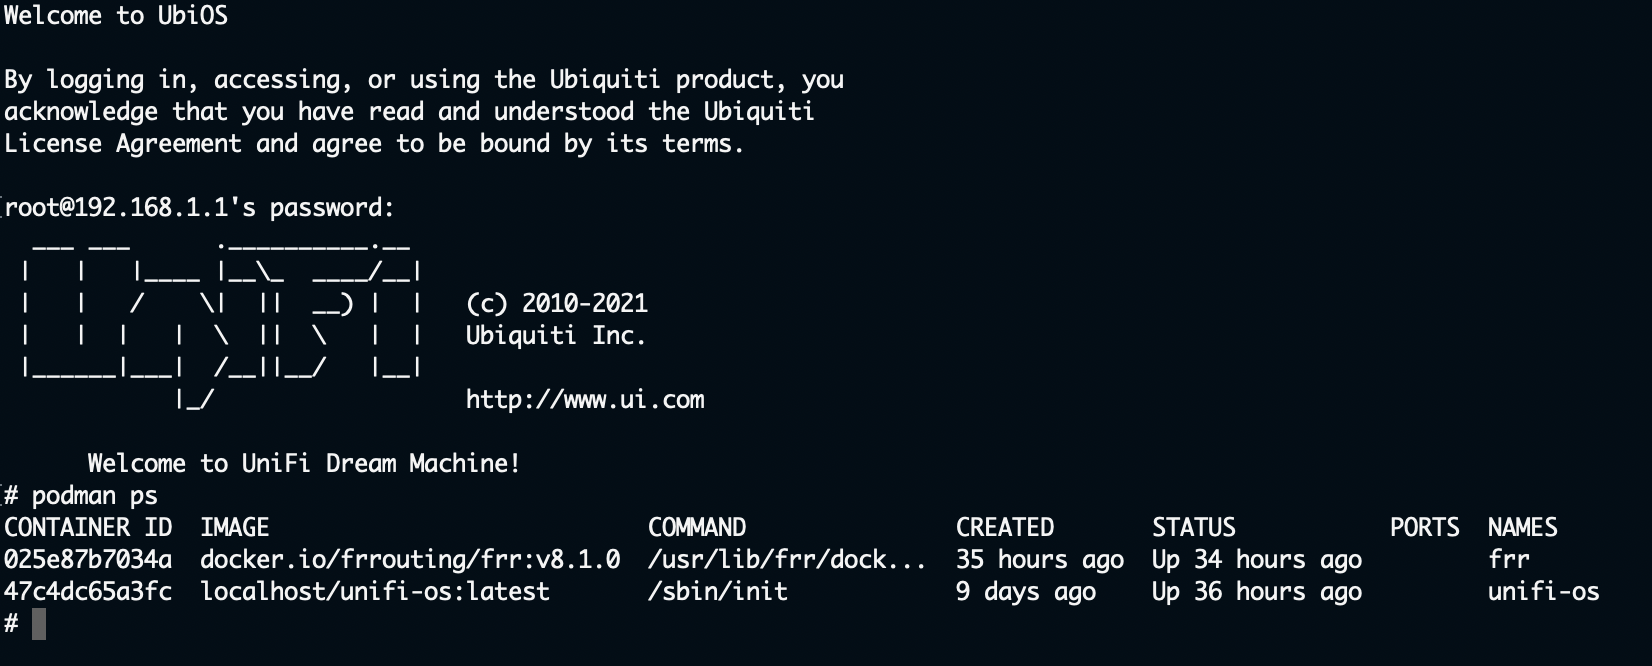
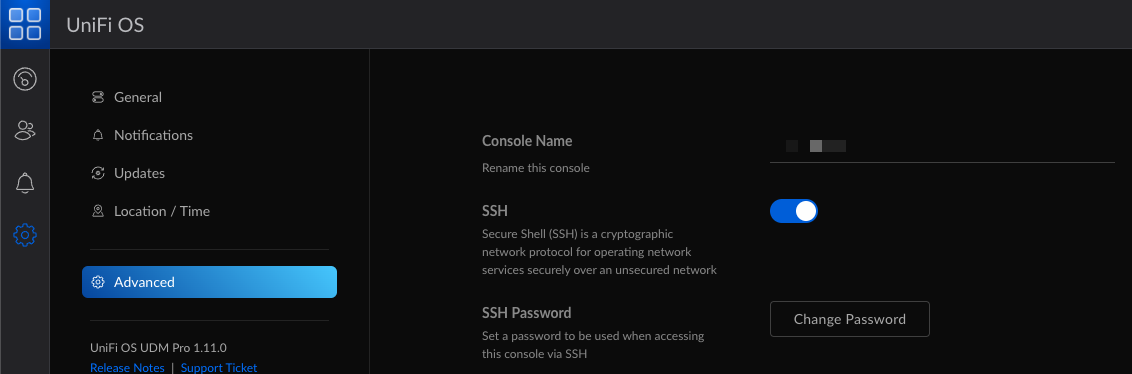
In the screenshot above you can see that I have two containers running. One is FRRouting and the other is the UniFi OS where the UniFi applications are running. To gain access to the device's shell like this you need to have enabled SSH access and know the password. This is configured through the UDM's settings:
To see the running containers once you have connected via SSH, you simply need the following command:
podman psWARNING: Please be careful in here. You can break things. I took a risk working this out for myself but I can't take responsibility if it doesn't work for anyone else for some reason.
Ok. Now that we have access, let's get down to business...
UDM-Utilities
The first thing we'll need to do is install something called UDMPro Boot Script. This utility was created by someone who wanted to make some tweaks or changes to their UDMP that would persist through reboots and firmware updates. The utility allows you to place shell scripts under /mnt/data and have them executed at boot time.
Assuming that you have connected via SSH already, you'll need to then drop in to the UniFi OS shell by typing:
unifi-os shellThe command line prompt should change to root@ubnt:/# at this point. The best approach is to then follow the instructions in the GitHub repository linked above. At the time of writing all that was required was to enter the following:
curl -L https://udm-boot.boostchicken.dev -o udm-boot_1.0.5_all.deb
dpkg -i udm-boot_1.0.5_all.deb
exit
The first line downloads the package. The second installs it. The exit command leaves the unifi-os shell.
FRRouting Preparation
Before we download / start FRRouting, I'm going to cover the two configuration files needed to get it running. Both of these will be stored under /mnt/data so that they persist through reboots and firmware updates.
From your SSH prompt, create the required directory:
mkdir -p /mnt/data/frrIn to this directory we need to create the following two files:
daemons
This file determines which features or functions of FRRouting will be enabled. By default everything is disabled. The content of the file is covered in the documentation but you just need to take the defaults and ensure that BGP is enabled by setting
bgpd=yes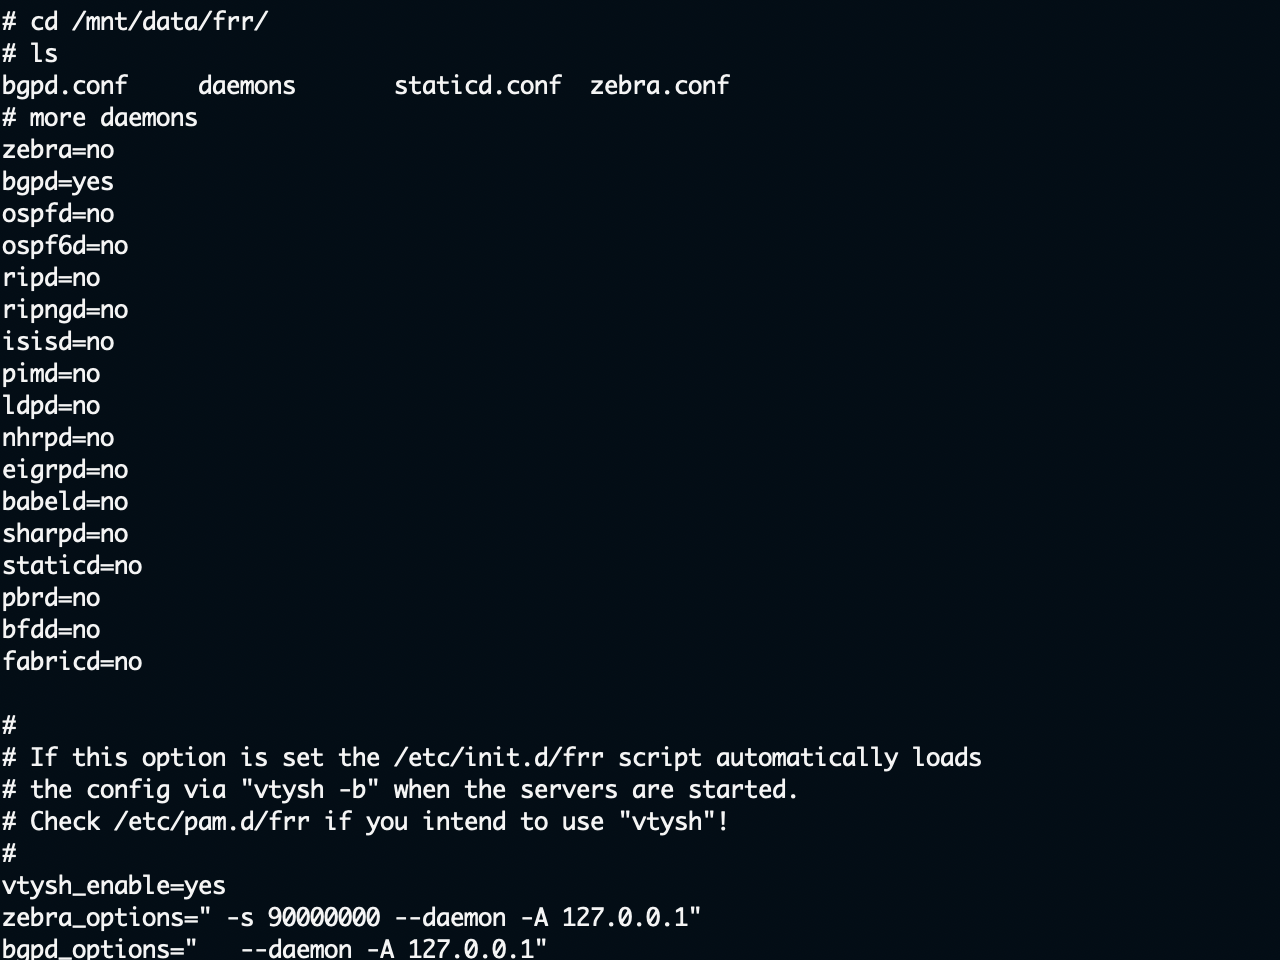
bgpd.conf
This file contains the configuration for the BGP daemon itself. I'm no expert when it comes to BGP so I've started off with a fairly simple configuration, as follows:
! -*- bgp -*-
hostname ukw-p-rtr-01
frr defaults datacenter
log file stdout
service integrated-vtysh-config
!
!
router bgp 65000
 bgp router-id 192.168.1.1
 neighbor 192.168.1.254 remote-as 65001
 !
 address-family ipv4 unicast
  redistribute connected
  redistribute kernel
  neighbor V4 soft-reconfiguration inbound
  neighbor V4 route-map ALLOW-ALL in
  neighbor V4 route-map ALLOW-ALL out
 exit-address-family
 !
route-map ALLOW-ALL permit 10
!
line vty
!
The important parts to have synchronised with NSX-T are the router ID and the AS numbers. Again the documentation contains more about all of the options.
Once these files are created, and making sure that they have 644 permissions, you can move on to FRRouting itself.
Installing / Starting FRRouting
If you're a dab hand with Ansible then you could do a lot of this with an Ansible role that has been created for the UDMP and is available on GitHub. If you're not comfortable with that, then you just need one of the files from that repository to get going. The file in question is 10-onboot-frr.sh. I have reproduced it here for clarity but all credit goes to Martin Buchleitner.
#!/usr/bin/env sh

DEBUG=${DEBUG:--d}
CONTAINER_NAME="frr"

if podman container exists ${CONTAINER_NAME}; then
  podman start ${CONTAINER_NAME}
else
  podman run --mount="type=bind,source=/mnt/data/$CONTAINER_NAME,destination=/etc/frr/" \
            --name "$CONTAINER_NAME" \
            --network=host \
            --privileged \
            --restart always \
            $DEBUG \
            docker.io/frrouting/frr:v8.1.0
fi
This file needs to be placed in the directory /mnt/data/on_boot.d and needs to be made executable. I think that 744 permissions should be sufficient although I have it set to 755.
That should be all you need. You can either restart your UDMP or run the script manually. Either way, the container should be downloaded and started.

Once it's running, you can "enter" it to check BGP's status.
Check BGP Status
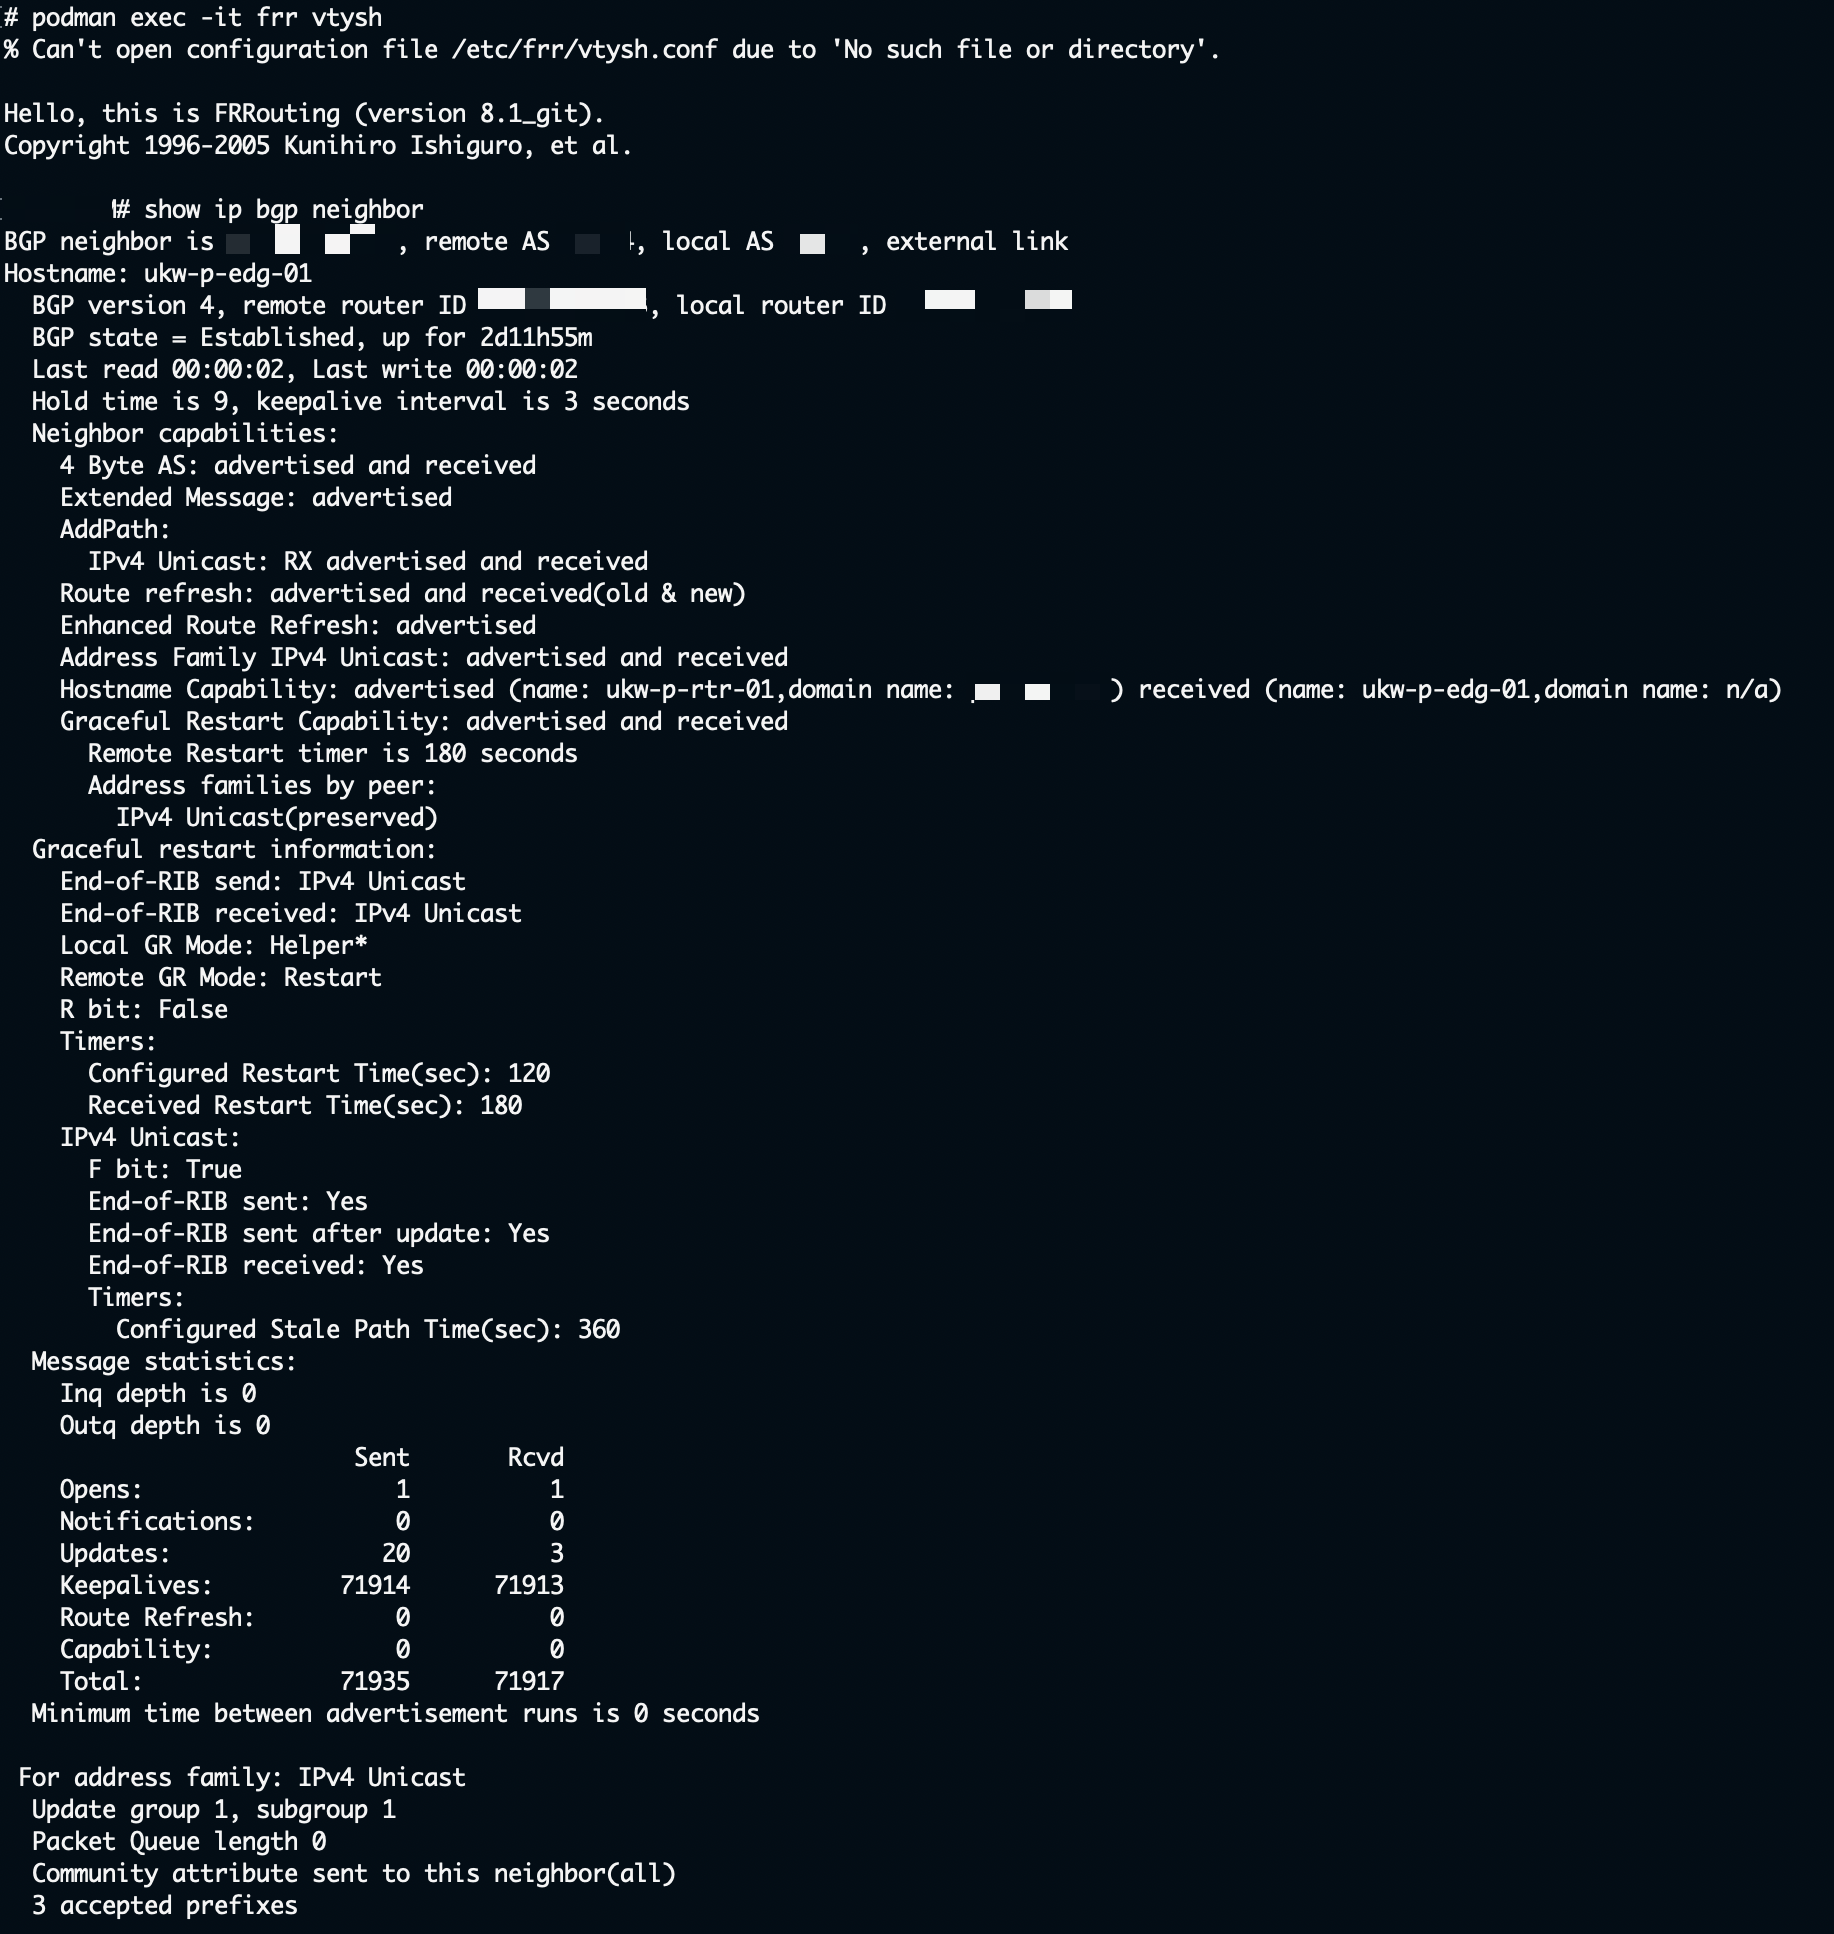
To connect to the BGP daemon and check the status of it, you run the following podman command:
podman exec -it frr vtyshThis will connect you to the shell running inside the container and allow you to interrogate BGP in much the same way as you would with any other network device.

For example, to show the BGP neighbors and status use the following:
show ip bgp neighborFurther down the screenshot below, you should be able to see that there are updates being sent and received.
The same can be seen in NSX-T.
Hope this helps...