Howto: Publishing offline Root CA certs and CRLs

Previously, I setup an offline Root CA in my homelab with the intention emulating a PKI setup that many enterprises seem to run.
The second stage of this process is publishing the Root CA certificate and CRL in a place that they can be accessed when the Root CA is offline. If you recall, I configured the Root CA to publish its CRL etc to a location on pki.o11n.lab. I now need to create that.
The Server
Rather than run my lab's online CA on a domain controller, which might be tempting but causes other issues, I have a domain joined server setup that will eventually become my online subordinate CA.
It's a vanilla Windows 2012 R2 server as before and a domain member.
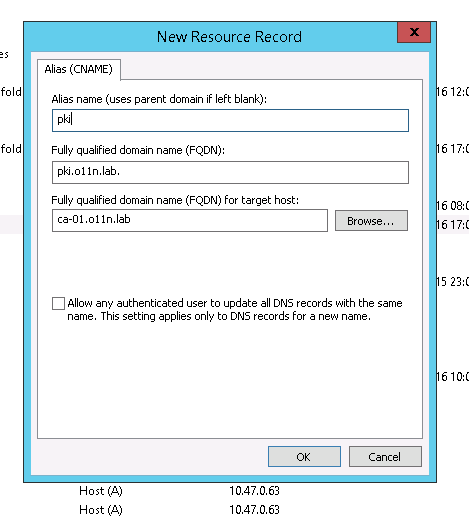
DNS
The VM is called “ca-01”, but I need to have pki.o11n.lab pointed to it too. That is accomplished fairly easily with a quick DNS CNAME record:
Root CA Certificate and CRL
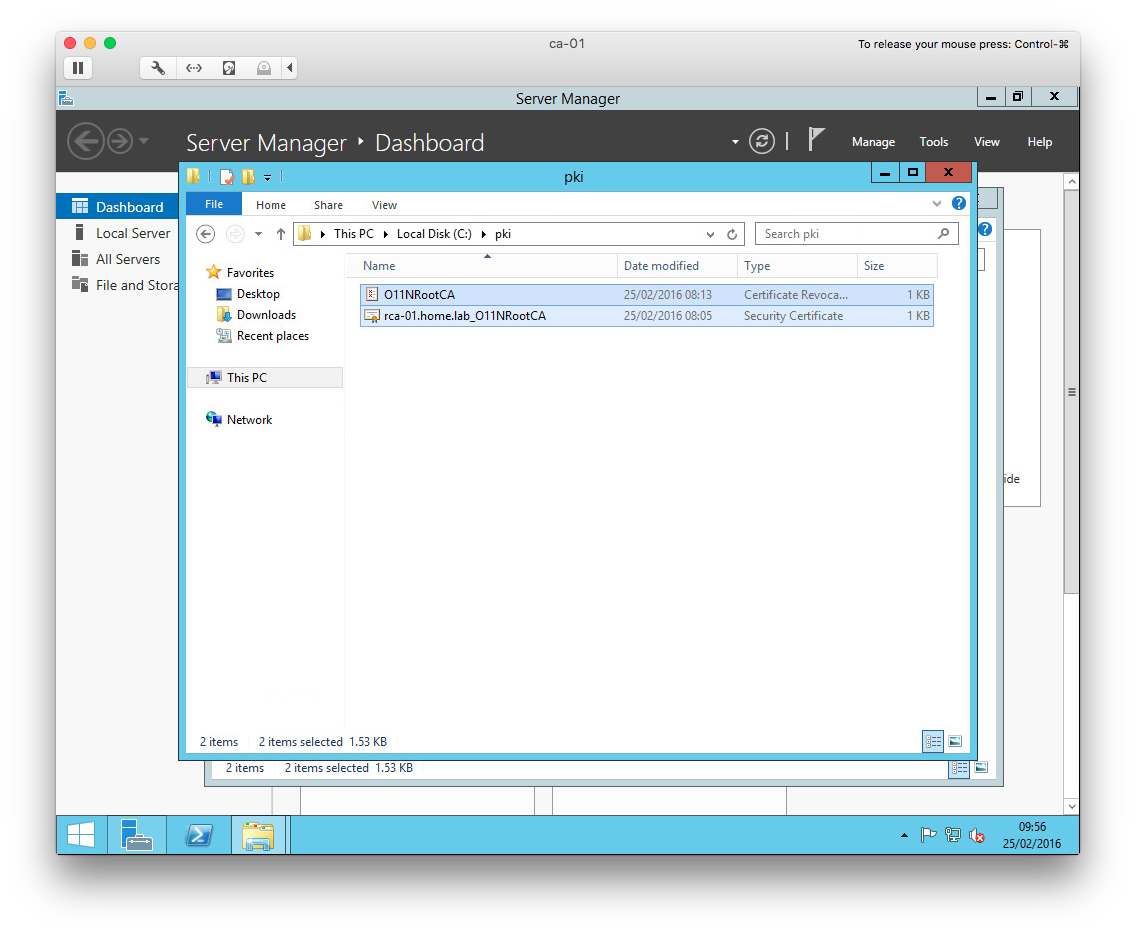
If this wasn't a lab environment, I'd probably add a disk to my online CA VM to host its data. Instead, I've created a folder called C:\pki and copied over the Root CA certificate and CRL files.
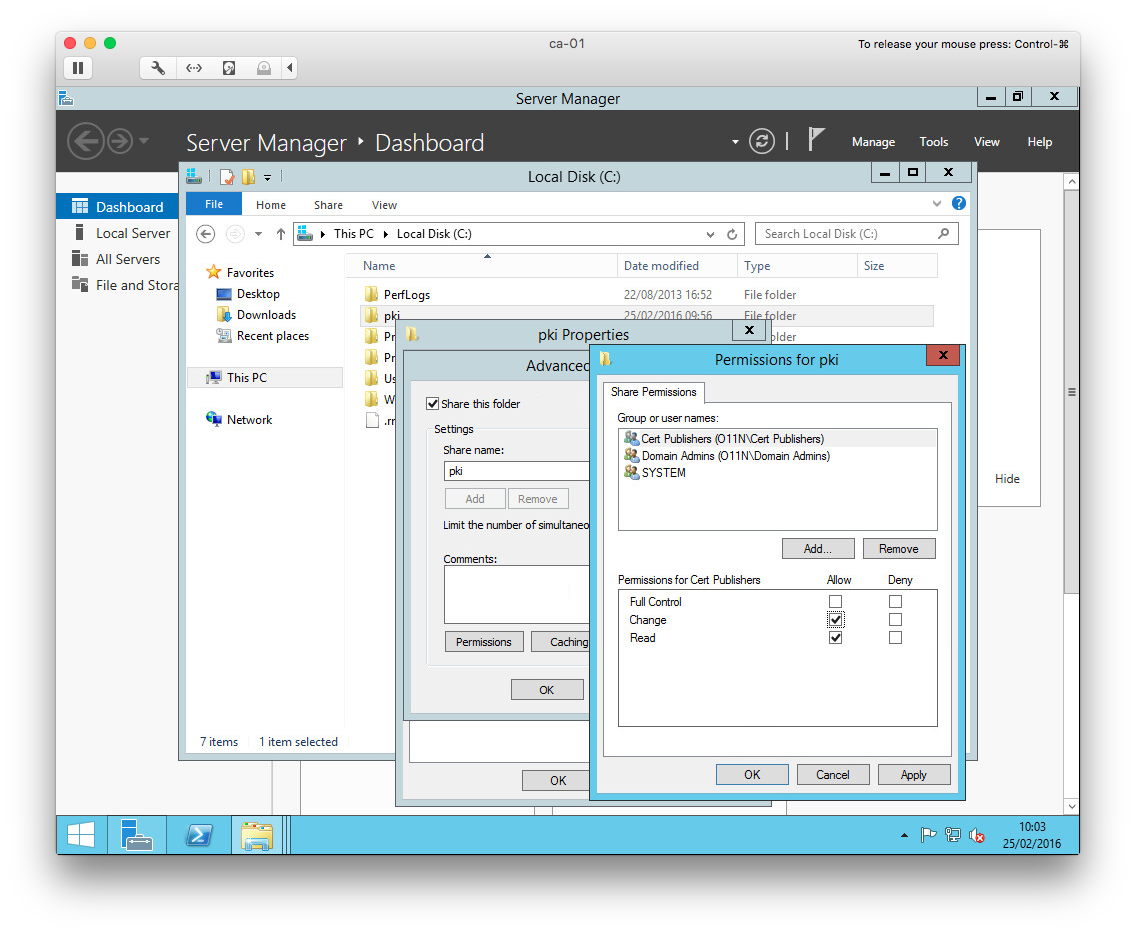
I've also shared this folder and granted permissions as follows:
- Domain Admins (Full Control)
- SYSTEM (Full Control)
- Cert Publishers (Change)
Publish to Active Directory
By publishing the RootCA certificate in to Active Directory, any domain joined Windows servers will automatically trust it. Standalone servers (and VMware appliances) will, of course, need to be instructed manually to trust the RootCA but I'll take care of that as and when the need arises.
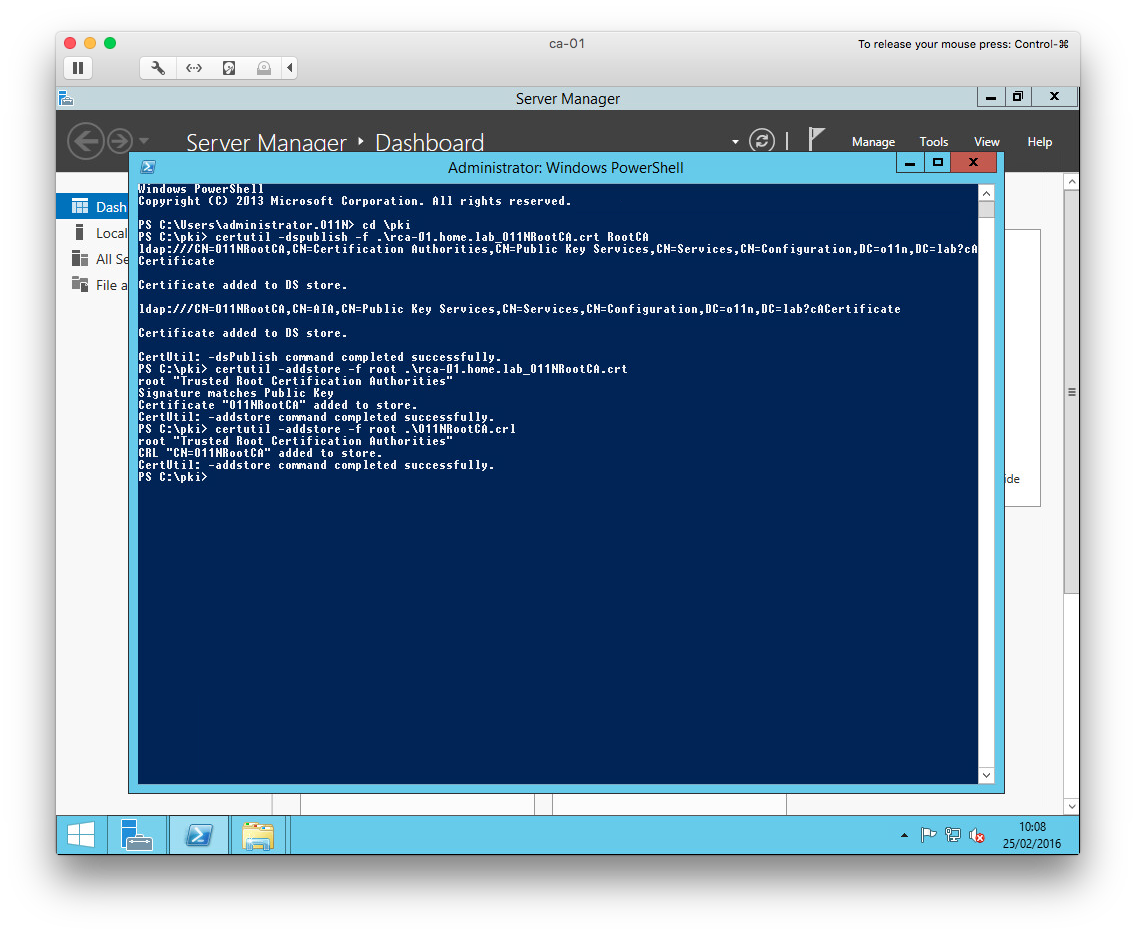
To publish the certificate to AD and trust it locally, the following commands were used:
certutil –dspublish –f .\rca-01.home.lab_O11NRootCA.crt RootCA
certutil –addstore –f root .\rca-01.home.lab_O11NRootCA.crt
certutil –addstore –f root .\O11NRootCA.crl
CPS, CRL and Root CA Certificate Distribution
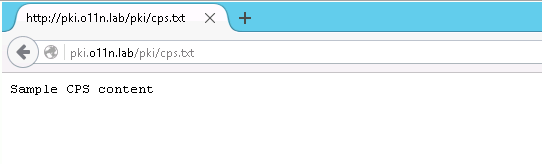
Before configuring HTTP distribution of the various files, I need to create the cps.txt file that was referenced in the previous article.
For me, that was simply accomplished by creating C:\pki\cps.txt and populating it with some sample text.
Next up, I installed IIS to serve up the files in C:\pki. That was completed by executing the following command on the online CA server:
Install-WindowsFeature Web-WebServer -IncludeManagementTools
Once that is completed, I created a new Virtual Directory for the PKI files:
New-WebVirtualDirectory -Site "Default Web Site" -Name "pki" -PhysicalPath "c:\pki"
It's probably easier to do the next bit in the IIS Manager. The permissions for the Virtual Directory need configuring as follows:
- Add “Cert Publishers” – allow Modify permission
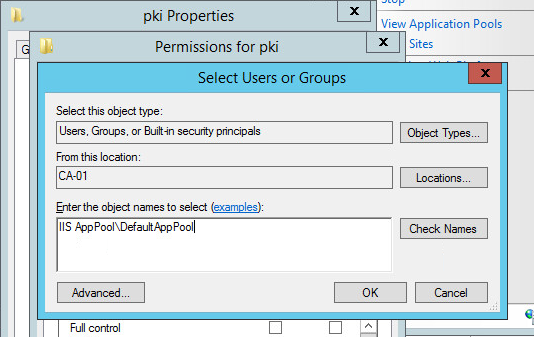
- Add “IIS AppPool\DefaultAppPool” – allow default permissions (read etc)
Note that with the second addition, it's a server local account and can't be found by browsing the local accounts. Sorry, you have to type it in verbatim.
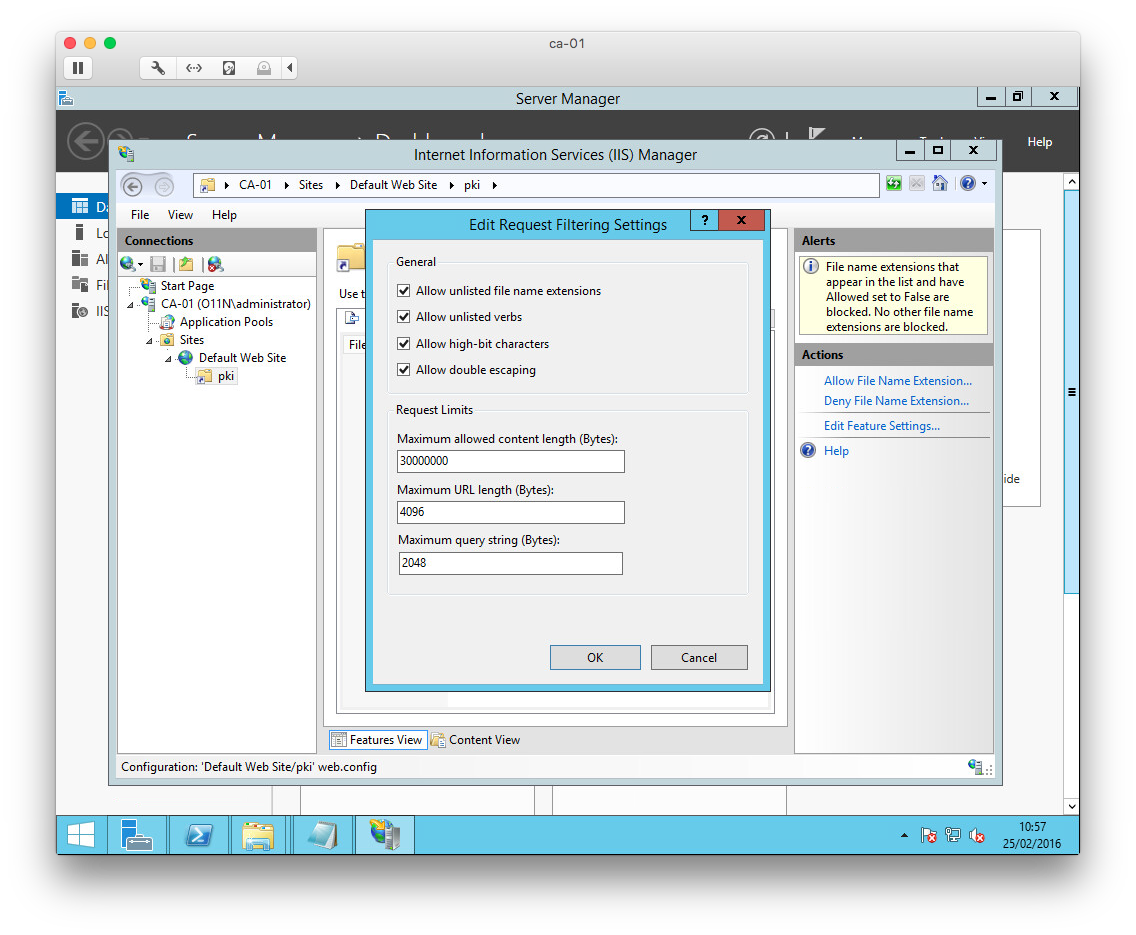
The final step is to allow double escaping in the request filtering settings. With the “pki” virtual directory selected, double-click “Request Filtering” in the centre pane. Then select Edit Feature Settings. Tick the checkbox for “Allow double escaping”.
There is now a website available that hosts the cps.txt file (see below), the Root CA certificate and CRL.
The final stage is configuring the online subordinate CA. I'll cover that in the next post.