Howto: Configuring a homelab online subordinate CA

A quick recap of where I got to. I have an offline Root CA (well, it's still online because I'll need it in a minute) and I've created a website on my online subordinate CA server to host the Root CA certificate and CRL files.
The purpose of the subordinate CA is to handle certificate signing and repudiation for all services in my infrastructure that require them. It will be granted the authority to do so by the Root CA. So this post covers the remaining steps of the process, which are:
- Installing and configuring the subordinate CA
- Signing the subordinate CA's certificate using the Root CA
- Delegating control of the subordinate CA to someone other than Domain Admins
Some elements of this process are very similar to the process of setting up the Root CA in the first place but there are some differences.
Installing the subordinate CA
As with the Root CA, I've done a lot of this via the command line. Other methods are available.
Using a powershell prompt on the subordinate CA, create and edit a CAPolicy.inf file using this command:
notepad c:\Windows\CAPolicy.inf
Insert the following text, taking care to make sure that the URL on line 8 is specific to your environment. It shouldn't break things if it's wrong but it's just the location of the Certificate Practice Statement file.
[Version]
Signature="$Windows NT$"
[PolicyStatementExtension]
Policies=InternalPolicy
[InternalPolicy]
OID=1.2.3.4.1455.67.89.5
Notice="Legal Policy Statement"
URL=http://pki.o11n.lab/pki/cps.txt
[Certsrv_Server]
RenewalKeyLength=2048
RenewalValidityPeriod=Years
RenewalValidityPeriodUnits=5
LoadDefaultTemplates=0
AlternateSignatureAlgorithm=1
There are fewer options used than for the Root CA.
To install the CA using these settings (make sure that the file is named “CAPolicy.inf” exactly, no extra file extensions), the following commands were used:
Add-WindowsFeature Adcs-Cert-Authority -IncludeManagementTools
Add-WindowsFeature Adcs-Web-Enrollment
Install-AdcsWebEnrollment
Install-AdcsCertificationAuthority -CAType EnterpriseSubordinateCA -CACommonName "IssuingCA-O11N-CA-01" -KeyLength 2048 -HashAlgorithm SHA256 -CryptoProviderName "RSA#Microsoft Software Key Storage Provider"
If you're following this, change the CA's common name (O11N-IssuingCA-01 in my case) to suit your environment. What you'll see at the end of it though is a big yellow warning that the installation is incomplete. This is because the CA's certificate now needs signing and issuing by the Root CA.
Requesting and signing the subordinate CA certificate
The warning text mentioned above tells you where the certificate request has been saved to. In my case, it was saved as C:\ca-01.o11n.lab_O11N-IssuingCA-01.req. This file must be copied to the RootCA to sign and issue the relevant certificate for the subordinate CA.
On the Root CA, the certificate request can be submitted using the command:
certreq -submit .\ca-01.o11n.lab_O11N-IssuingCA-01.req
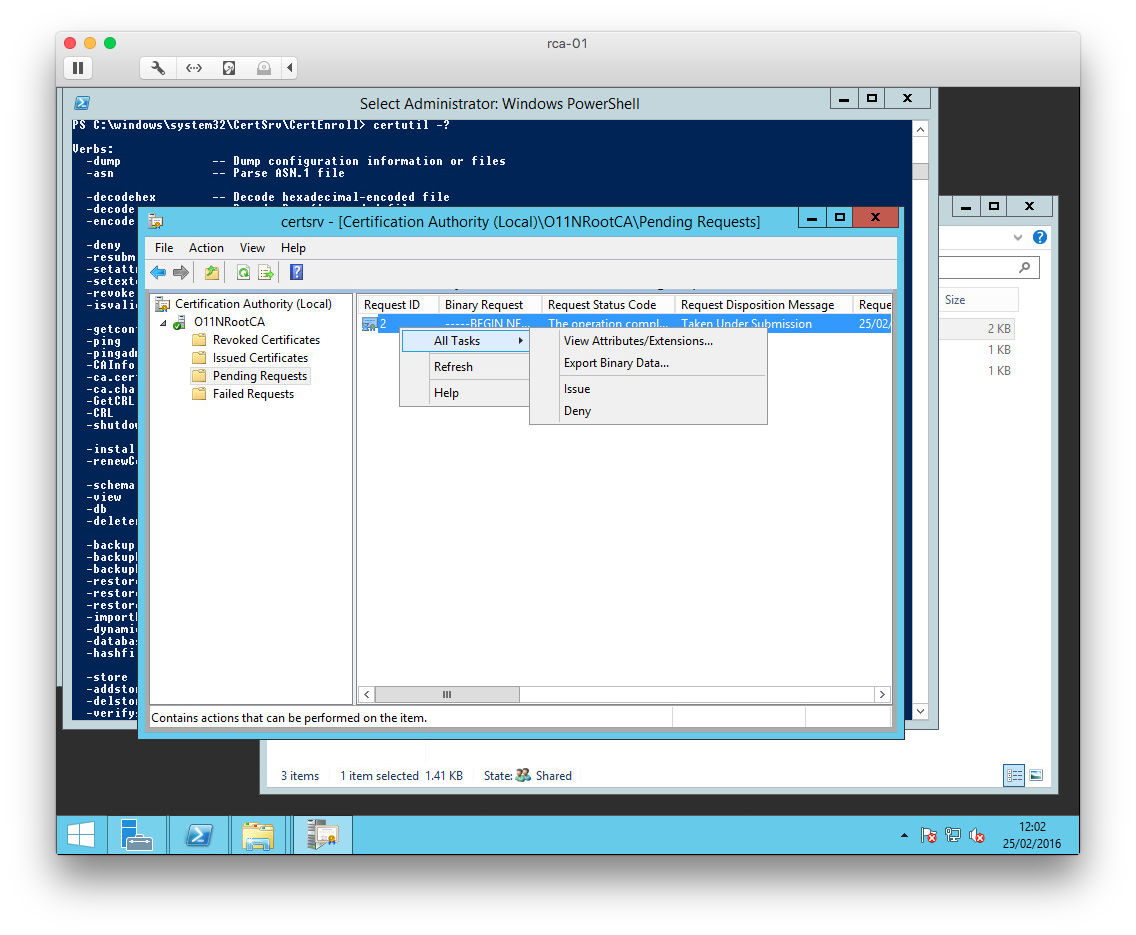
If it works, you'll see that the request is now pending. Take note of the request number. (It was “2” in my case.)
![]()
To sign and issue the certificate, you need the Certification Authority tool. Find the request and Issue it.
The issued certificate can easily be exported using the following command:
certreq -retrieve 2 .\ca-01.o11n.lab_O11N-IssuingCA-01.crt
The certificate then needs copying back to a temporary location on the subordinate CA. Once there, it can be installed and the certificate authority service started:
certutil -installcert .\ca-01.o11n.lab_O11N-IssuingCA-01.crt
Start-Service certsvc
As a final step, copy the contents of C:\Windows\System32\certsrv\CertEnroll to C:\pki. It now looks like this:

Configuring the subordinate CA CRLs
As with the Root CA, I wanted to set up the distribution points for the CRLs to suit my environment.
The first step is to remove the existing points:
Get-CACrlDistributionPoint | Remove-CACrlDistributionPoint -Force
Next, I created three new CRL distribution points.
- The first point is to a local file on the CA server:
Add-CACRLDistributionPoint -Uri C:\Windows\System32\CertSrv\CertEnroll\%3%8%9.crl -PublishToServer -PublishDeltaToServer -Force
- The second point is to a web URL that is hosted locally on the subordinate CA:
Add-CACRLDistributionPoint -Uri http://pki.o11n.lab/pki/%3%8%9.crl -AddToCertificateCDP -Force
- The third and final distribution point is to the “pki” virtual directory:
Add-CACRLDistributionPoint -Uri file://\\ca-01.o11n.lab\pki\%3%8%9.crl -PublishToServer -PublishDeltaToServer -Force
Configuring the subordinate CA AIA settings
As with the Root CA, configuring the AIA settings is necessary.
As before, we're going to clear out the original settings first:
Get-CAAuthorityInformationAccess | Remove-CAAuthorityInformationAccess -Force
Next, the “certutil” command is used to config a few default settings:
certutil -setreg CA\CRLPeriodUnits 2
certutil -setreg CA\CRLPeriod "Weeks"
certutil -setreg CA\CRLDeltaPeriodUnits 1
certutil -setreg CA\CRLDeltaPeriod "Days"
certutil -setreg CA\CRLOverlapPeriodUnits 12
certutil -setreg CA\CRLOverlapPeriod "Hours"
certutil -setreg CA\ValidityPeriodUnits 5
certutil -setreg CA\ValidityPeriod "Years"
certutil -setreg CA\AuditFilter 127
Finally, we restart the CA service and re-publish the CRLs.
Restart-Service certsvc
certutil -CRL
That's the online subordinate CA configured.
Configuring CA permissions
In a lab environment, particularly mine, it'll be used be very few people. All the same, it's a good practise to configure proper delegated security controls. After all, I don't want to give every account Domain Admin access just so that they can request and issue certificates. To that end, I created a couple of Active Directory security groups that I used to govern access to the CA.
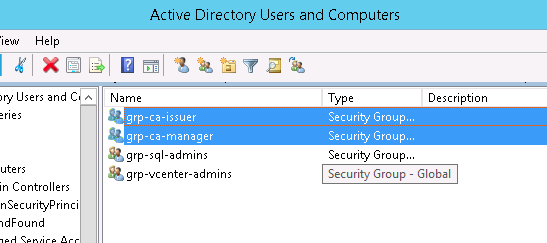
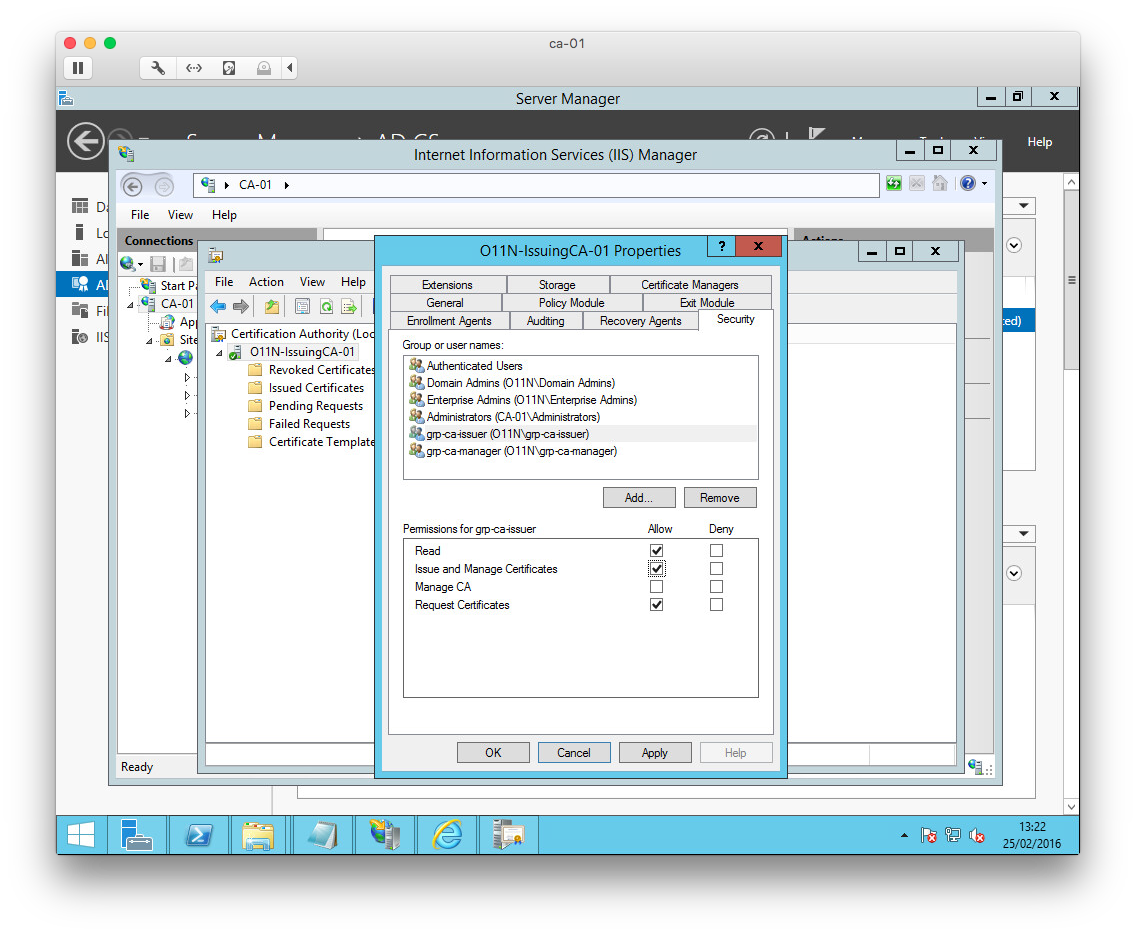
To use these groups, all that is required is to open the Certification Authority manager and open the properties for the CA. On the Security tab, I just added the groups and assigned them relevant permissions.
Next steps
Now that my lab PKI infrastructure is setup, one of the key tasks is to start using it! This means generating signed and trusted certificates for vSphere and vRA for example. For that, I might need to setup some certificate templates. If the web enrollment is to be used to do this, the Subordinate CA's IIS website needs configuring with an SSL certificate. The instructions in this Microsoft article describes how that is done.
It's important not to forget though that there are some remedial tasks to complete. Both the Root CA and the Subordinate CA could do with being hardened. The Root CA in particular needs to be kept safe and taken offline.