Howto: Configuring a homelab offline Root CA

Self-signed SSL certificates are all well and good but they're not meant to be for the real world. The trust issues they cause can be a headache on customer projects and anything that's going in to production shouldn't be using them.
For that reason, I thought it'd be better to change my homelab so that it uses a slightly more realistic PKI setup. The first phase of that is creating an offline Root CA as it's something that a good number of customers use too.
Step 1: DNS
From a DNS perspective, my homelab is split up so that anything physical and fundamental to the lab (e.g. storage / NAS, physical hosts, switches etc) lives in its own DNS domain (home.lab). Everything else from vCenter and AD downwards is in one or more other DNS domains and on separate VLANs etc. Now even though I'm planning to setup my Root CA as a VM, I'm going to keep it in the same DNS domain and the physical stuff because that seems to be a better fit for it.
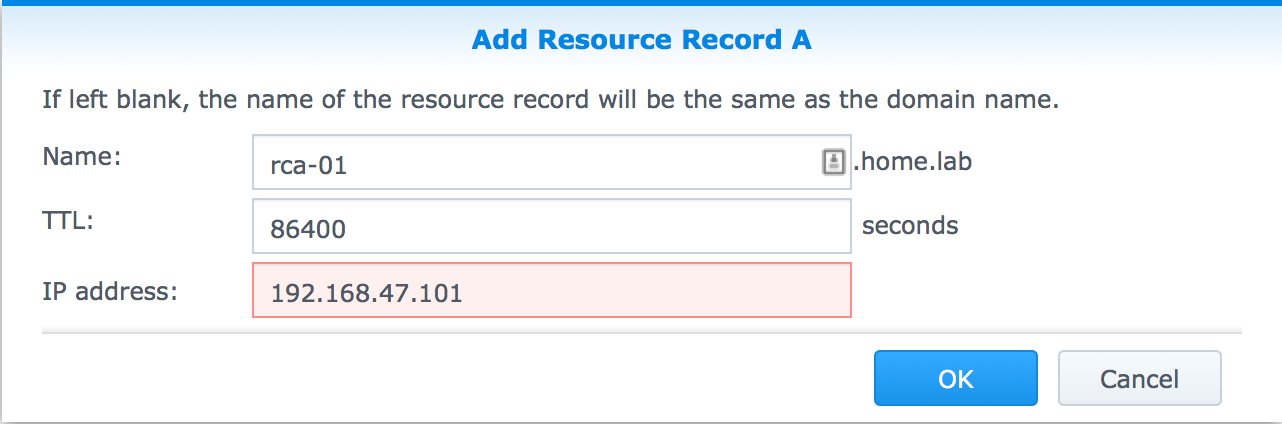
So before doing anything else, I needed to create DNS entries for my Root CA on my NAS (which doubles as DNS master for the home.lab domain).
Of course, the idea of an offline CA is that it's not connected to a network. For the installation and setup of it though, I want to make sure that it's patched etc.
Step 2: Deploy a VM
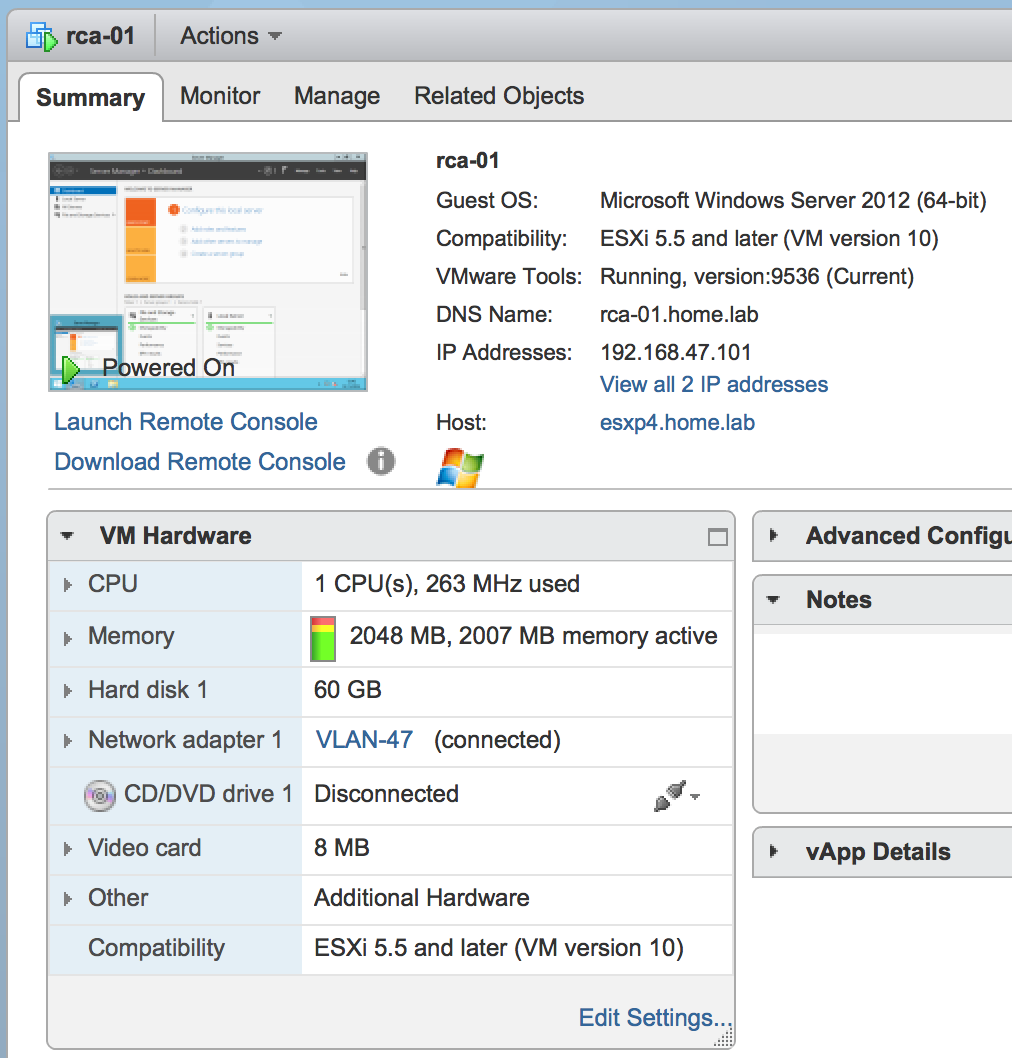
This sort of thing is bread and butter really but it's just a vanilla Windows 2012 R2 VM that is NOT domain joined but I have set up its network identity (name, DNS name and IP details) and connected it to a portgroup that my other lab infrastructure exists on.
 Step 3: Add the CA Role
Rather than including blow-by-blow screenshots from server manager, my installation was performed through the command line as much as possible. The first step is creating a configuration file.
Using a powershell prompt, create and edit a CAPolicy.inf file using this command:
notepad c:\Windows\CAPolicy.inf
Insert the following text, taking care to make sure that the URL on line 8 is specific to your environment. It shouldn't break things if it's wrong but it's just the location of the Certificate Practice Statement file.
[Version]
Signature="$Windows NT$"
[PolicyStatementExtension]
Policies=InternalPolicy
[InternalPolicy]
OID=1.2.3.4.1455.67.89.5
Notice="Legal Policy Statement"
URL=http://pki.o11n.lab/pki/cps.txt
[Certsrv_Server]
RenewalKeyLength=2048
RenewalValidityPeriod=Years
RenewalValidityPeriodUnits=20
CRLPeriod=weeks
CRLPeriodUnits=26
CRLDeltaPeriod=Days
CRLDeltaPeriodUnits=0
LoadDefaultTemplates=0
AlternateSignatureAlgorithm=1
When the CA is installed using the .inf file above, its certificate will be valid for 20 years and the validity of the CRL will be 26 weeks.
To install the CA using these settings (make sure that the file is named “CAPolicy.inf” exactly, no extra file extensions), the following commands were used:
Add-WindowsFeature Adcs-Cert-Authority -IncludeManagementTools
Install-AdcsCertificationAuthority –CAType StandaloneRootCA –CACommonName "O11NRootCA" –KeyLength 2048 –HashAlgorithm SHA256 –CryptoProviderName "RSA#Microsoft Software Key Storage Provider"
If you're following this, change the CA's common name (O11NRootCA in my case) to suit your environment.
Step 4: Configure CRLs
By default, this CA will publish its Certificate Revocation List (CRL) in locations that aren't useful as the server will be powered off for most of its life. Therefore the CRL distribution points needed reconfiguring.
The first step is to remove the existing points:
Get-CACrlDistributionPoint | Remove-CACrlDistributionPoint -Force
Next, I created two new CRL distribution points. For both, “%3%8” will be substituted by the CA with the CA's name and the CRL Name Suffix values:
- The first point is to a local file on the CA server:
Add-CACRLDistributionPoint -Uri C:\Windows\System32\CertSrv\CertEnroll\%3%8.crl -PublishToServer -Force
- The second point is to a web URL that I'll host on another server later:
Add-CACRLDistributionPoint -Uri http://pki.o11n.lab/pki/%3%8.crl -AddToCertificateCDP -Force
The second distribution point will be added to the CA's certificate so that other servers know where to get the CRL from.
Step 5: Configure AIA
Authority Information Access locations are URLs that are added to a certificate in its authority information access extension. These URLs can be used by an application or service to retrieve the issuing CA certificate.
As before, we're going to clear out the original settings first:
Get-CAAuthorityInformationAccess | Remove-CAAuthorityInformationAccess -Force
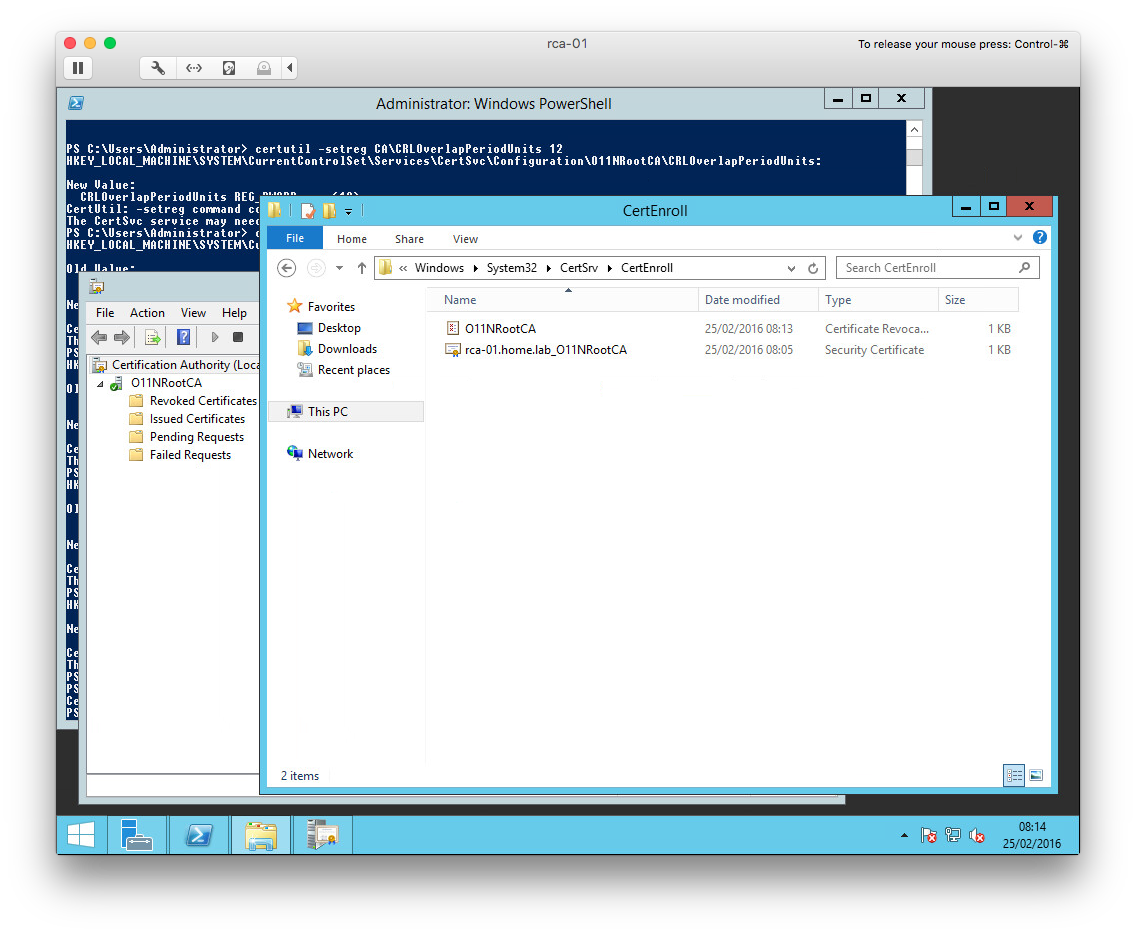
Next, the “certutil” command is used to config a few default settings:
certutil -setreg CA\CRLOverlapPeriodUnits 12
certutil -setreg CA\CRLOverlapPeriod "Hours"
certutil -setreg CA\ValidityPeriodUnits 10
certutil -setreg CA\ValidityPeriod "Years"
certutil -setreg CA\AuditFilter 127
Finally, we restart the CA service and re-publish the CRLs.
Restart-Service certsvc
certutil -CRL
That's the offline Root CA configured. If you look at the C:\Windows\System32\CertSrv\CertEnroll folder, you'll see the CRL and CA certificate files. It's a good idea to copy these off the server as they'll be needed to configure an online subordinate CA. I'll cover that off in the next post.